Key Takeaways:
- Minor leaking tap issues can often be fixed with simple DIY steps using the right tools and replacement parts
- Always turn off the water supply before starting any repair.
- Proper reassembly and testing are essential to ensure the leak is fully resolved.
- Persistent leaks or signs of damage may indicate deeper plumbing issues.
- Professional assessment is recommended if the problem cannot be resolved safely.
Introduction
A dripping tap may seem like a minor inconvenience, but it is often an early sign of wear within your plumbing system. Taps are used frequently throughout the day, which means internal components such as washers, cartridges, and seals are constantly under pressure. This repeated use can lead to gradual deterioration, even if the tap appears to function normally at first.
Recognising these early signs is important, as addressing them promptly can prevent more complex issues from developing. By understanding the basics of fixing a leaking tap, homeowners can take simple steps to manage minor problems early. With a few checks and straightforward repairs, it is possible to resolve common tap issues without immediate professional plumber repair work.
What are the Common Causes of a Leaking Tap?
Most tap leaks are not caused by the tap itself but by worn or damaged internal components. Over time, these parts deteriorate due to regular use, pressure, and exposure to water.
1. Worn O-Ring
The O-ring is a small rubber component that forms a seal within the tap. When it becomes loose or degraded, water may begin to drip from the spout or handle.
2. Faulty or Mismatched Washer
Washers regulate the flow of water. With repeated use, they may harden, crack, or become incorrectly fitted. This potentially leads to leakage when the tap is turned on or off.
3. Damaged Cartridge (Mixer Taps)
Mixer taps rely on cartridges to control water temperature and pressure. A worn or damaged cartridge can result in continuous dripping, even when the tap is fully closed.
4. Corroded Valve Seat
The valve seat connects the tap to the spout. After prolonged use, corrosion may develop due to mineral deposits. This eventually causes leaks from the spout area.
5. Excessive Water Pressure
High water pressure places excessive stress on internal components over time. This can force water through weak points, resulting in persistent dripping.
What Happens If You Ignore a Leaking Tap
Leaving a leaking tap unattended can lead to more than just a minor nuisance. What may start as a slow drip can gradually develop into a more persistent issue, affecting both your plumbing system and the surrounding areas.
Fixing a leaking tap in a timely manner helps prevent the following issues:
1. Mould Growth
Constant moisture around sinks and surfaces creates an environment where mould can develop. This may affect indoor air quality and hygiene.
2. Water Damage
Prolonged exposure to water can damage cabinets, flooring, and fixtures. Materials such as wood are vulnerable to swelling and deterioration.
3. Water Wastage
Even a slow drip can waste a significant amount of water over time. This contributes to higher utility bills, especially in households with frequent water usage.
What You Can Check Before Calling a Plumber
Before engaging a professional to fix a leaking tap, it is useful to carry out a few basic checks. These steps help confirm the source of the issue and determine whether it can be resolved through DIY attempts.
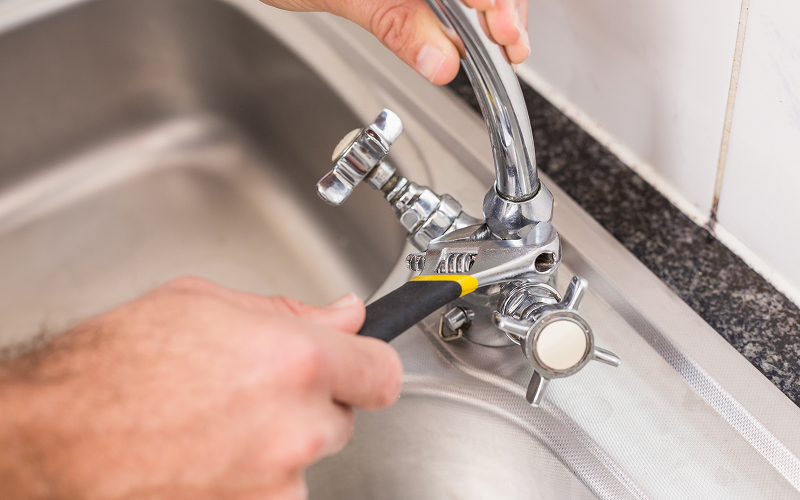
Start by identifying which tap is leaking and where the drip originates. Check whether the leak is constant or only occurs when the tap is in use. Inspect visible joints and fittings to ensure they are secure and not loose.
If the issue appears to be internal, you may proceed with a basic repair if you are comfortable handling simple tools.
Simple DIY Steps for Fixing a Leaking Tap
Minor tap leaks can often be resolved with straightforward steps. Ensure that you have the correct tools and replacement parts before starting.
Step 1: Turn Off the Water Supply
Locate the shut-off valve under the sink or basin and turn it off completely. This prevents water flow while you work on the tap.
Step 2: Remove the Tap Handle
Remove any decorative caps covering the screw. Unscrew and gently lift the handle to expose the internal components.
Step 3: Access Internal Components
For compression taps, remove the valve cover to access the washer. For mixer taps, loosen the retaining nut to reach the cartridge.
Step 4: Inspect and Replace Worn Parts
Check washers, cartridges, and seals for signs of wear. Replace any damaged components with properly sized replacements.
Step 5: Check O-Rings
Inspect the rubber O-rings for cracks or looseness. Replacing these small parts often resolves minor leaks effectively.
Step 6: Reassemble and Test
Reassemble all components securely without over-tightening. Turn the water supply back on and observe whether the leak has stopped.
When DIY Fixes Are Not Enough
While simple repairs can address minor wear, some issues require closer inspection. Persistent leaks, corrosion, or irregular water pressure may indicate deeper problems within the system. In such cases, professional assessment is recommended to determine the root cause of the issue and prevent further damage. What appears to be a simple leak may be linked to underlying problems such as worn internal fittings, hidden pipe damage, or irregular water pressure within the system.
Homeowners may also consider water leak detection in Singapore to identify issues that are not immediately visible. Advanced detection methods allow professionals to locate concealed leaks behind walls, under sinks, or within flooring without unnecessary disruption.
Why Professional Support Is Important
Handling more complex issues without proper knowledge may lead to further damage. Professional plumbers are trained to identify underlying causes and provide long-term solutions.
Reliable plumbing and services ensure that leaks are addressed thoroughly, reducing the risk of recurrence. This approach also helps maintain the integrity of the overall plumbing system, especially in older homes where wear is more likely.
How QB Plumbing Supports Homeowners
For homeowners who prefer a safe and efficient solution, QB Plumbing provides trusted support across Singapore. As a PUB-licensed company, our team handles a wide range of plumbing work, from minor tap repairs to more complex system issues.
Their approach focuses on identifying the root cause of the problem and resolving it effectively. This helps prevent repeated repairs and protects your home from further water-related damage.
Contact us for prompt, professional assistance to fix your leaking tap.